This reference focuses on setting up Microsoft Office 365 Outlook. These settings are also similar in other versions of Microsoft Outlook. You can use this reference to set up previous versions of Microsoft Outlook.
To Set Up Your E-mail Account in Outlook
In Outlook, select “File” and click “Account Settings”, then “Manage Profiles”.
Next, Click “Yes” if prompted to allow Outlook to make changes to your device, then click “Email Accounts.”
On the Account Settings window, click “New…”
On the Add Account window, select “Manual setup or additional server types” and click Next.
For your server type, select “POP or IMAP” and click Next.
On the POP and IMAP Account Settings window, enter your information as follows:
- Your Name-Enter your first and last name
- E-mail Address-Enter your e-mail address
- Account Type-Select POP3 or IMAP
- Incoming mail server-Enter mail.rainierconnect.com for your incoming mail server
- Outgoing mail server (SMTP)-Enter mail.rainierconnect.com for your outgoing mail server
- User Name-Enter your e-mail address, again
- Password-Enter the password you set up for your e-mail account, and check “Remember Password” box
- Click “More Settings”
On the Internet E-mail Settings window, select the “Outgoing Server” tab.
Select “My outgoing server (SMTP) requires authentication.”
Select “Use same settings as my incoming mail server.”
Select the “Advanced” tab and change the “Outgoing server (SMTP)” port to 587.
Click OK.
Click Next.
Click Finish.
E-Mail login format: Fully qualified (username and password are both case-sensitive)
Server settings: SSL and/or TLS/STARTTLS encryption should be enabled.
Incoming: POP – mail.rainierconnect.com – Port 995 if using SSL, Port 110 if using TLS/STARTTLS
Incoming: IMAP – mail.rainierconnect.com – Port 993 if using SSL, Port 143 if using TLS/STARTTLS
Outgoing: SMTP – mail.rainierconnect.com – Port 465 if using SSL, Port 587 if using TLS/STARTTLS – SMTP Authentication Required
Stream TV doesn’t require a special cable box or installation. It works with your Lightcurve Internet connection. You can use many popular multi-functional boxes and mobile devices.
Choose from the supported devices below – chances are you already own one or more!
| Service Type | Device Name |
|---|---|
| Managed Android TV Set Top Box |
Android TV OS 11 and 12:
|
| Apple Phone & Tablet |
iPhone (iOS 14+):
iPad (iOS 14 – iPadOS 14+):
|
| Android Phone & Tablet |
VARIOUS (Android 11+):
Samsung
PLANNED TO SUPPORT – TBD:
|
| TV Streaming Stick |
Amazon Fire TV (Fire OS 5+)
Android TV (OS 9+)
|
| TV Retail Streaming Set-Top-Box |
Apple (tvOS 14+)
Android (OS 8+)
Amazon Fire TV (Fire OS 5+)
|
| TV Android Operator Tier Streaming Set-Top-Box |
Android (OS 9+)
|
| TV Smart Soundbar |
Amazon Fire TV (OS 6+)
|
| TV Smart TV |
Amazon Fire TV Omni 4K Series
Amazon Fire TV 4-Series 4K UHD
Amazon Fire TV Edition (OS 5+)
Android TV (OS 8+)
Smart TV
|
| TV Game Console |
There are no plans to support any Gaming Consoles. |
| Web Browser |
Mozilla
Microsoft
Apple
|
Lightcurve Stream Account Set-up
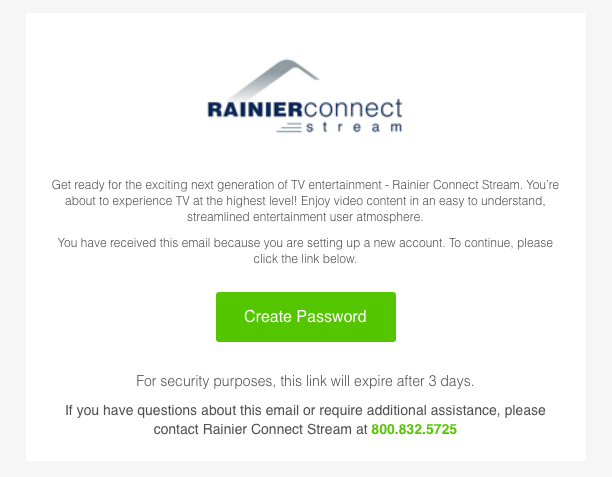
When you first sign up for Lightcurve Stream, you will receive an email with a link to set up your Stream account password. The image below is what you should see in your email. You may need to check your spam or junk folder incase your email provider or client has filtered it accidentally.

Please note this email will expire 3 days from when it was first sent. If the setup email has expired please call into Technical Support and we’ll send you a new one.
Click on the button that says “Create or Reset Password now” and you will be taken to a screen to enter your desired password. Confirm the password and submit. Make sure to keep track of this password for future use, if you forget your password you can request a reset at the main sign in screen.
Once this password has been set up successfully, you’ll be able to use your email and password to sign into any version of Lightcurve Stream across all of the various platforms.
Click here for links to download apps to use on your device. You can also search for Lightcurve Stream in the app store of your device.
For Rich Webmail View:
- Go to RainierConnect.com website click on My Account/Services in the upper right hand corner.
- Select “Change Webmail Password.”
- Input your username and password.
- Once logged in click on the key on the upper left hand side of the screen next to your email address.
- Enter you new password and click the tab that say “Update Mailbox Password.” You have now completed your password change.
**IF USING SAFARI PLEASE MAKE SURE YOUR COOKIES ARE ENABLED, IF NOT YOU WILL BE LOGGED OUT AFTER SELECTING PASSWORD. **
To enable your cookies for Safari.
From your Mac home screen:
- Select Safari.
- In the top left corner select Safari a second time.
- Scroll down to and select Preferences.
- Select the Privacy Tab.
- Look for “Block Cookies and other website data” Select Never.
- Exit out of screen.
- It is recommended after updating your new password to change your Safari cookie settings back to your preference or to “From third parties and advertisers”. (To do so follow the instructions 1-6 again).
Visit www.watchtveverywhere.com. Click “Log In,” and enter your username and password. Click on the TV Network you want to watch, and you’ll see a list of available programs.
To use WatchTVEverywhere, you must first complete a one-time registration. To get started, visit www.watchtveverywhere.com, select Rainier Connect as your cable service provider from the drop-down menu, and click “submit.” Make sure you have your last bill handy – you’ll need your account number, and the correct spelling of the last name on the account. Click “Register” to start the registration process.
WatchTVEverywhere works anywhere you can receive an Internet signal: in your house, at work, at the mall, at a hotel, the airport, a vacation home- anywhere! Wired connections and in-home WiFi will provide the best overall quality. The quality of WatchTVEverywhere service while traveling (airports, stores, etc) will vary with the signal strength and bandwidth of the Internet connection you use. Be extra careful when traveling, especially outside the U.S. because data roaming charges may apply, and they can be very expensive.
To place an international call with Rainier Connect follow the steps below:
For Canada and Caribbean countries:
1 + area code + local number
For Mexico:
011 + 52 + city code + local number (local numbers may be 7 or 8 digits)
*To call a mobile phone in Mexico, dial 011 + 52 + 1+ city code + local number
All other countries:
011 + country code + city code + local number
For a list of country codes, click here.
For international telephone rates, click here.
You may notice a delay before the call connects when dialing and international phone number. To avoid this delay, press “#” after dialing the number.


